Governance
The next section in the left panel is called Governance. It includes several functionalities, which are briefly explained in this chapter.
Django Settings
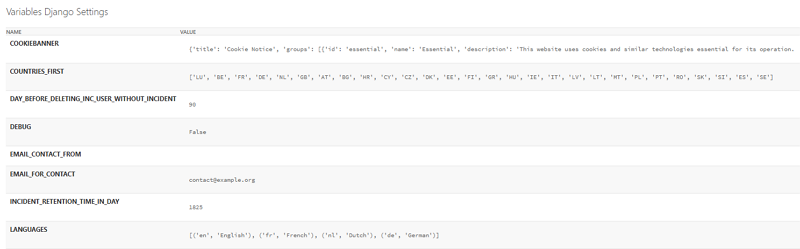
You can use the Django Settings to check the configuration of your SERIMA server instance. The variables you can see here are read-only.
Entity categories
The Platform Admin creates the categories for the Operators. Entity categories are used for the classification of operators (depending on the terminology used in different regulations, operators, companies, and entities may be used to refer to the same thing).
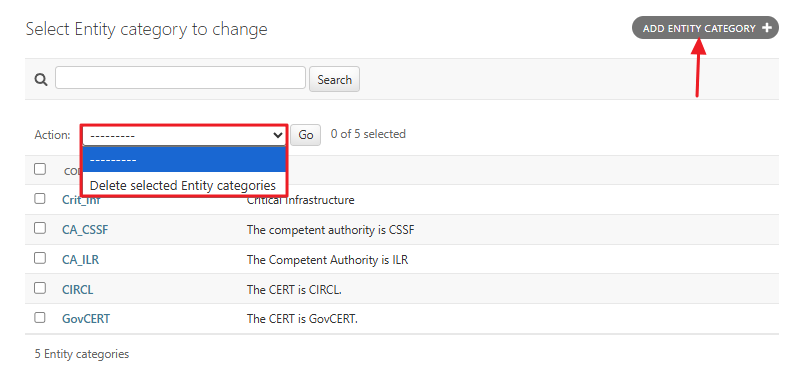
Click the Entity categories link in the Governance section to go to the Select entity category to change screen. Here, you can see a list of categories (if any have been set up). You can create new categories by clicking the Add Entity Category button in the top right corner.
To delete a category, first select it by checking the box next to the category. Then, open the Action drop-down menu and choose the Delete selected entity categories option, and click Go.
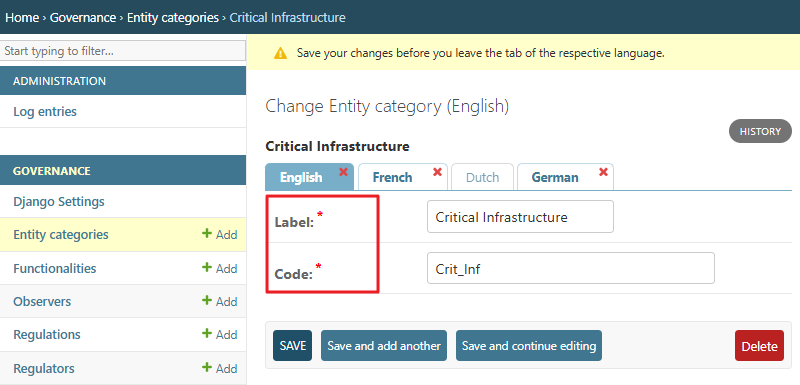
There are two columns on the Change Entity category screen. The Code column on the left displays the code you assigned to the entity when you set it up. The Label column indicates the type of classification you want to create for different entities in the SERIMA system. This is also defined when you create a new entity category or modify an existing one.
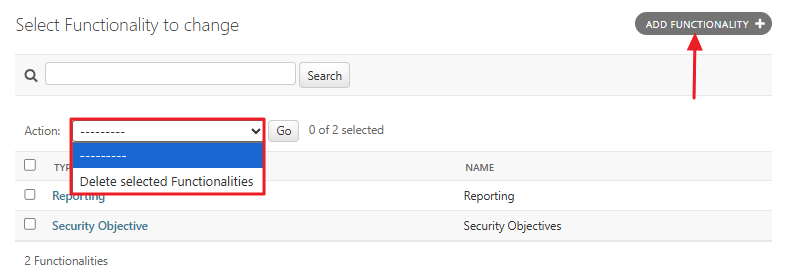
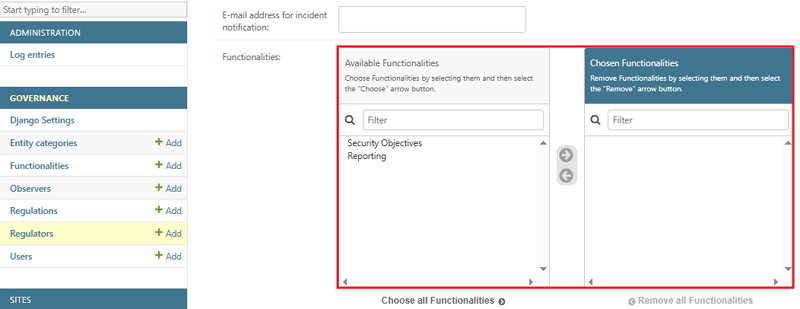
Functionalities
The Functionalities section shows which modules are enabled in the platform. As per the screenshot below, there are two modules set up in the system: Reporting and Security Objective.
You can create new Functionalities by clicking the Add Functionality button in the top right corner. To delete a Functionality, first select it by checking the box next to the functionality. Then, open the Action drop-down menu and choose the Delete selected Functionalities option, and click Go.
Observers
An observer is a type of regulator with limited permissions. Observers cannot edit incidents on the platform; they have read-only access and can only view incidents.
As a Platform Admin, you can create an Observer either by clicking the Add Observer button in the top-right corner or by selecting the Add link in the Governance section. The Change Observer screen appears, where you can set up a new Observer.
When creating a new Observer, provide its name, description, country, and address. Then configure its functionalities by selecting and adding them to the Chosen Functionalities list:

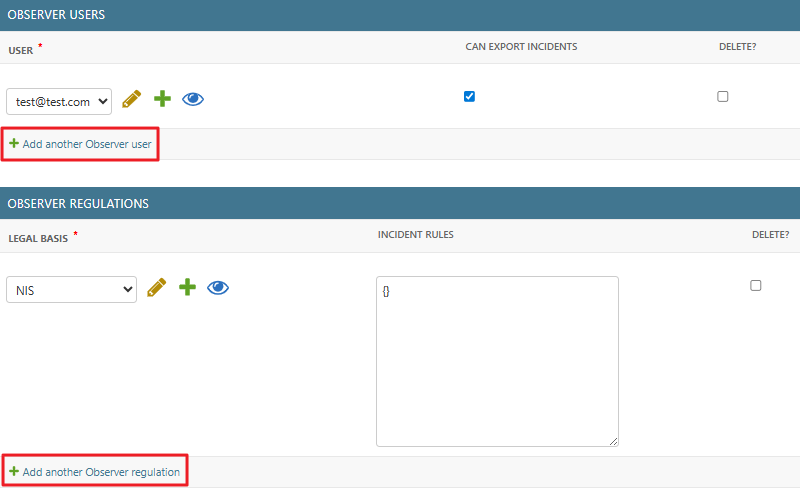
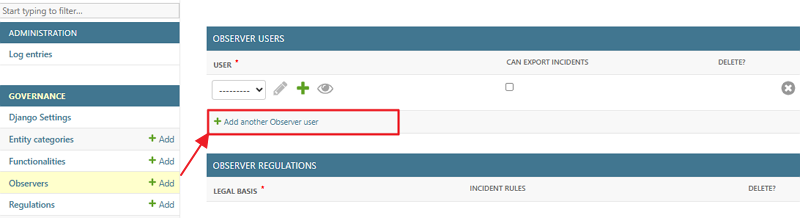
Finally, add observer users and observer regulations (legal basis) to the Observer. Use the down-pointing arrows to open the dropdown menus and select a different user or regulation.
If you cannot find the item you are looking for, use the Add another Observer user and Add another Observer regulation links to create new entries.
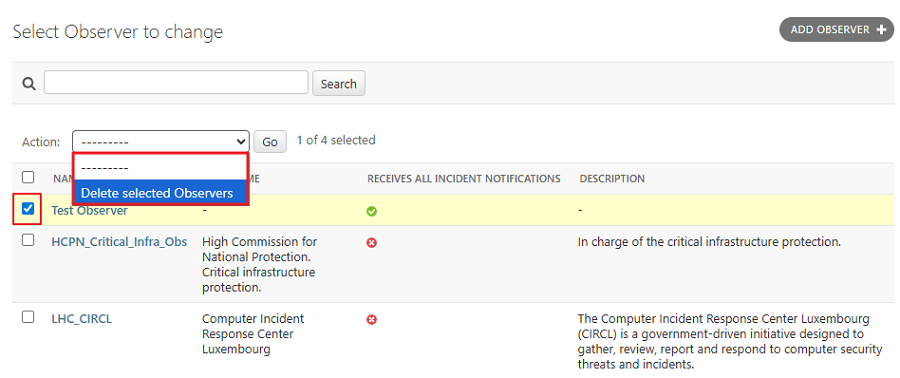
To delete an Observer, first select it by checking the box next to the observer entry. Then, open the Action drop-down menu and choose the Delete selected Observers option, and click Go.
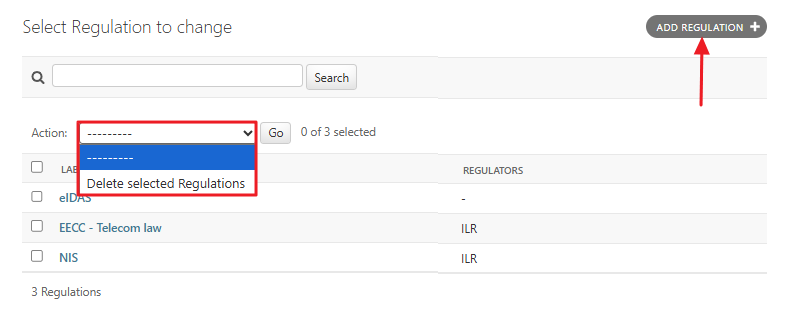
Regulations
SERIMA is a multi-regulation platform, allowing you to create different workflows for different regulations.
As a Platform Admin, you can set up new regulations either by clicking the Add Regulation button in the top-right corner or by selecting the Add link in the Governance section. Either way, you will be directed to the Add Regulation screen, where you can assign a label for the regulation and add regulators to it:
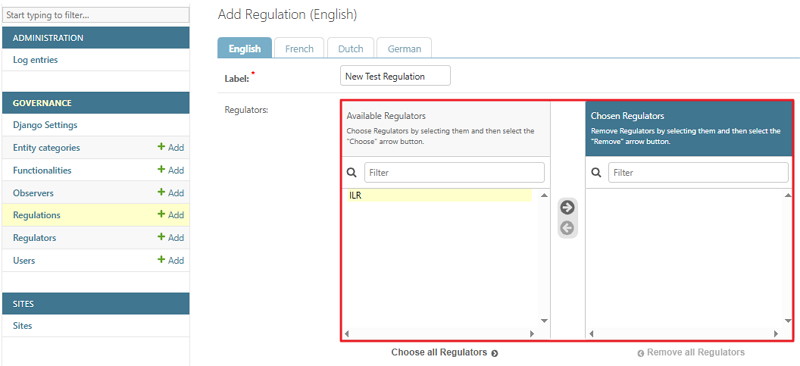
When creating a regulation, you need to add a Label for it (labels are displayed in the first column, as shown in the screenshot below). Then, you need to assign a regulator from the list and save your changes.
To delete a regulation, first select it by checking the box next to the regulation entry. Then, open the Action drop-down menu and choose the Delete selected Regulations option, and click Go.
Regulators
By following the Regulators link in the Governance section, you can check the list of Regulators set up in the system. As a Platform Admin, you can set up new regulators either by clicking the Add Regulator button in the top-right corner or by selecting the Add link in the Governance section.
The Add Regulator screen appears, where you can set up a new Regulator. When creating a new Regulator, provide its name, description, country, address, and email address (for incident notification). Then configure the regulator’s functionalities by selecting and adding them to the Chosen Functionalities list:
Delete a regulator user
To delete a regulator user, go to the Regulator Users section of the chosen regulator. Choose a user you want to delete (1), put a checkmark into the checkbox in the Delete column (2), and click Save (3):

Fig. 13 NOTE: Do NOT use the red Delete button in the lower right-hand corner! It deletes the Regulator itself.
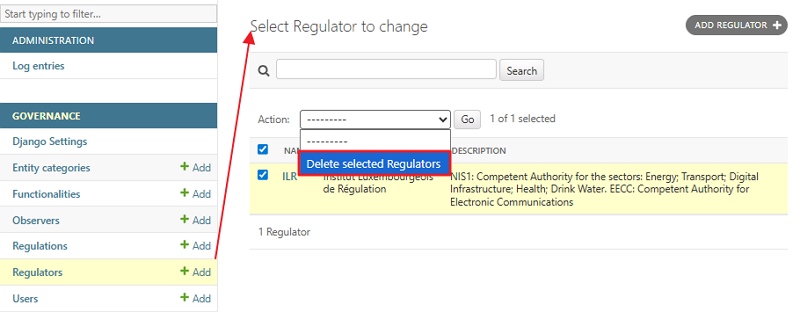
Delete a Regulator
You have two options to delete a regulator:
Select the Regulator by checking the checkbox next to the regulator entry. Then, open the Action drop-down menu and choose the Delete selected Regulators option, and click Go.
Click the name of the regulator on the Select Regulator to change screen to open the Change Regulator screen. Once on the Change Regulator screen, click the red Delete button in the lower right-hand corner. If you have the necessary permission level, the chosen regulator will be deleted from the system.
Users
Platform Admins can create other Platform Admins, Regulator Admins, and Observer Users. If you click the Users link in the Governance section, you will be directed to the Select User to Change screen. This screen lists all users (Platform Admins, Regulator Admins, and Observer Users) that the Regulator Admin of your SERIMA instance has set up.
You can add new users by clicking the Add link in the Governance section or by using the Add User link in the top right-hand corner. The Add User screen appears, where you can provide basic information such as First Name, Last Name, Email Address, and Phone Number.
After creating a user, remember to add them to one of the entities (Regulators or Observers). To do this, open the Regulator or Observer where you want to link the user. For example, to add a user to an Observer, click the Observer’s name, and on the Change Observer screen, use the Add another Observer user option to link the user to the selected Observer.
To create Observer users, use the Observers link. To create Regulator users, use the Regulators link in the Governance section.
In case you have many users in your SERIMA instance, use the Filter on the right. You can filter users by regulators, observers, or roles. By default, all options are displayed. To narrow the list, click the specific link you are looking for. For example, under By Roles, clicking Regulator Admin will display only the Regulator Admins in your system.
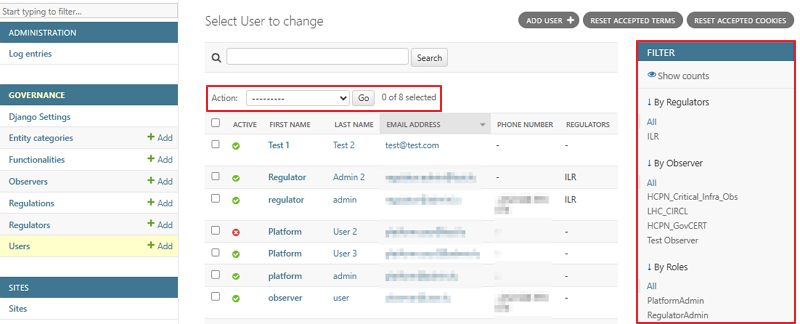
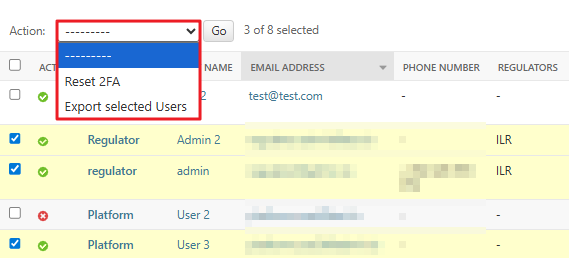
Besides filtering, you can sort users by clicking the heading of the column you want to sort, either in ascending or descending order. To manage users, first select the checkbox in front of the user you want to modify, then choose the desired action from the Action dropdown menu.
Export selected Users
Select the users you want to export by checking the box next to each relevant user. Then, open the Action dropdown menu, choose Export Selected Users, and click Go. The selected users will be exported to a CSV file.
The screenshot below shows that three out of eight users have been selected. By choosing an action from the Action dropdown and clicking the Go button, the selected action is performed: for example, resetting 2FA or exporting the three selected users.