Security Objectives Dashboard
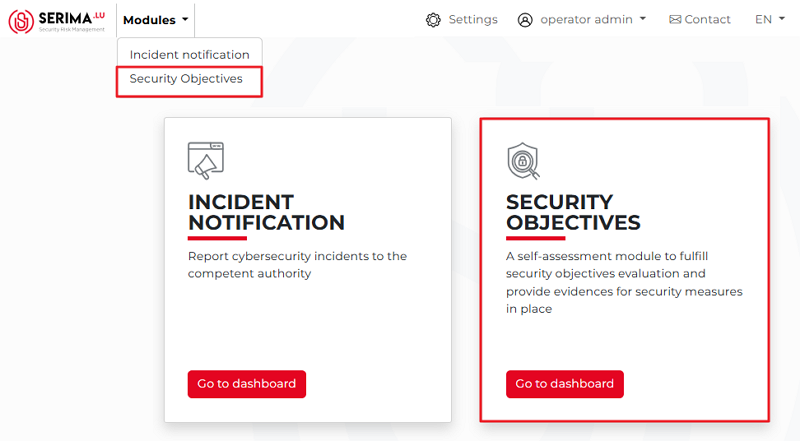
The other main part of the SERIMA platform is the Security Objectives module.
The security objectives module is a self-assessment tool used to evaluate security objectives and provide evidence of the security measures in place.
You can begin the process by either clicking the Modules drop-down menu and selecting Security Objectives, or by clicking the Go to Dashboard button on the Security Objectives tile in the center of the screen.
Either way, you will get to the Security Objectives Dashboard, where you can create your security objectives. The Security objectives dashboard is a central screen where you can manage all your security objectives. Due to the complexity of the screen, its different parts will be presented one by one, with numbered sections describing the functionality of each.
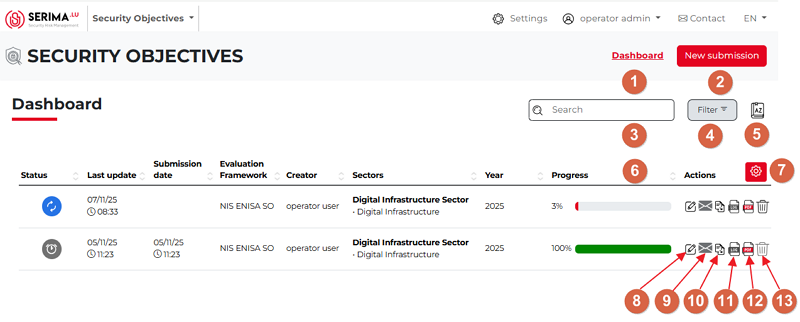
Dashboard: By clicking the Dashboard link in the top-right corner, you can return to the landing page of the Security objectives dashboard.
New submission: By clicking the red New submission button in the top-right corner, you can create a new security objectives entry.
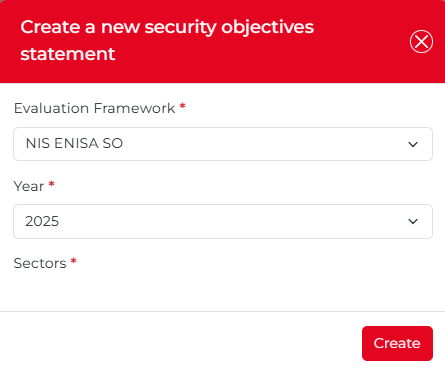
The Create a new security objectives pop-up opens, where you can begin the process by using the dropdown menus to select the evaluation framework, year, and sector options.
3. Search: The search function can be useful if there are many security objective entries and you want to filter among them according to different aspects to find the entry you are looking for.
4. Filter: You can search among your submission entries by Standard (NIS ENISA SO), Year of submission, Sectors, Status (Unsubmitted, Under review, Passed, Passed and sent, Revision required, and Revision required and sent), and Submitter user (a list of users who submitted a security objective).
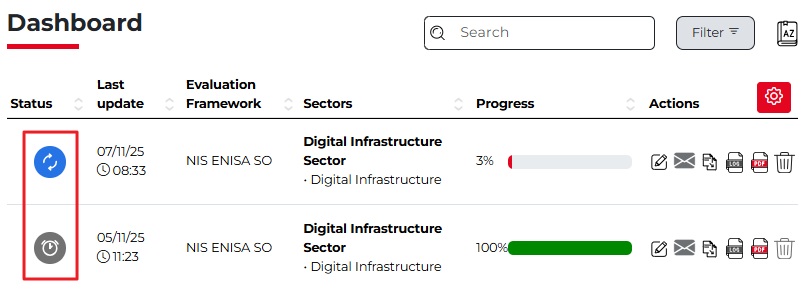
5. Icon guide: The Icon Guide is represented by a book-shaped icon labeled AZ. Clicking this icon displays the legend above the security objective submission entries list (highlighted in yellow in the screenshot below).
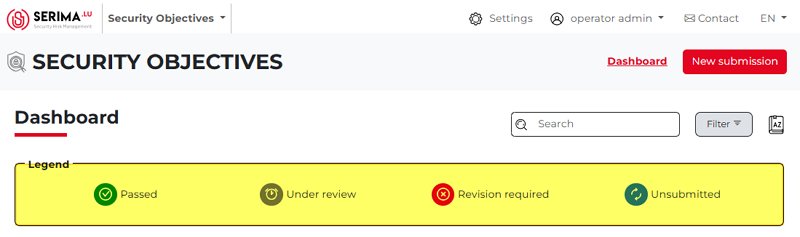
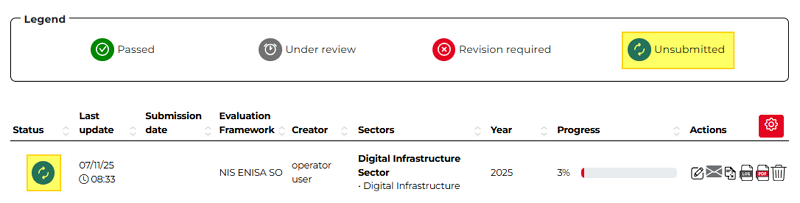
These legends appear in the Status column on the far left of the security objectives list. By looking at the status of the entry item, you can have a quick overview of its status. You can hide the legend by clicking the Icon guide again. As you can see in the screenshot below, the status of the security objective entry is Unsubmitted. You can also see that the progress of completing the security objective is currently only 3% (Progress column).
6. Column headers: On the dashboard, security objective entries are displayed in a table with the following headers: Status, Last update, Submission date, Evaluation Framework, Creator, Sectors, Year, Progress, and Actions (highlighted in yellow in the screenshot below).

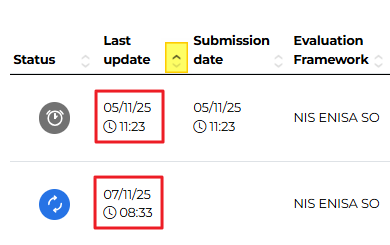
Each column has an up-and-down arrow on its right edge. Clicking the arrow sorts the entries in ascending or descending order based on that column. Only one sorting option can be active at a time, and the active option is indicated by a darker grey triangle. As shown in the screenshot below, the two entries are sorted by Last update in ascending order, with the most recent incident at the bottom and the earlier one above.
7. Column settings: By default, all columns listed in point six are displayed on the dashboard. To hide a column or change which columns are shown, click the Column Settings icon, which is a white gear icon on a red background. Hovering your mouse over the icon displays the tooltip Column Settings.

Clicking the icon opens the Choice of columns pop-up, showing all available columns. A checkmark in front of a column name indicates that the column is currently displayed. To hide a column, simply remove the checkmark next to the relevant column name.
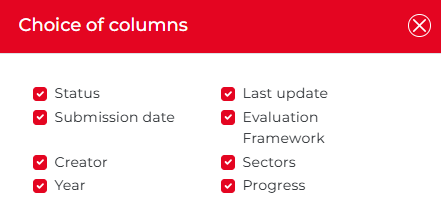
For example, if a column always contains the same value (the creator or the evaluation framework is the same), it is worth hiding those columns. Hiding them can make the security objectives list on the dashboard cleaner and easier to understand. Once you uncheck a checkbox, the relevant column/s immediately disappear/s from the dashboard.
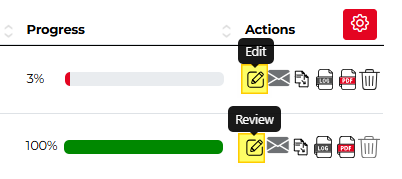
8. Edit/Review: Click the pencil icon to edit or review the selected entry. You can edit a security objective as long as it has not been submitted. Once it has been submitted, you can only review it; editing is no longer possible. If you hover your mouse over the pencil icon (highlighted in yellow in the screenshot below), a tooltip labeled Edit or Review will appear.
Send: Click the envelope icon to send the security objective. This icon is being replaced with the Comment feature in SERIMA.
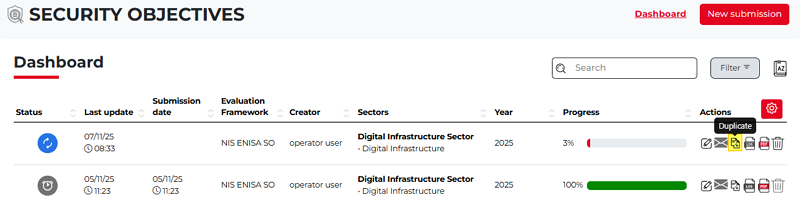
10. Duplicate: If you want to duplicate a security objective, click the duplicate icon (highlighted in yellow in the screenshot below). Please note that creating an entry can be time-consuming, as you need to complete 29 forms. This function is, therefore, very useful when creating similar security objectives, as it can save a considerable amount of time and effort.
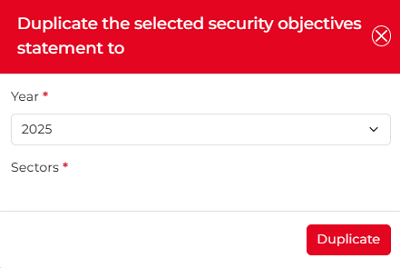
Once clicked, the pop-up below appears. Select the year from the dropdown, choose a sector, and then click Duplicate.
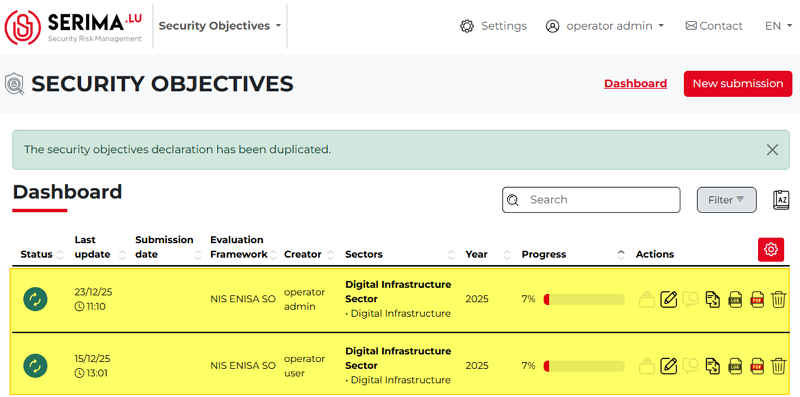
The selected entry is then duplicated and appears in the list.
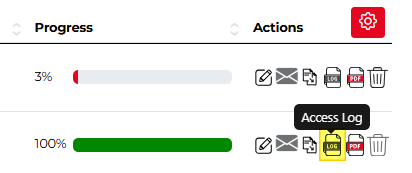
11. Access log: For each entry, the access log displays all activities that occurred during the incident’s lifecycle. If you hover your mouse over the Log icon (highlighted in yellow in the screenshot below), a tooltip labeled Access log will appear.
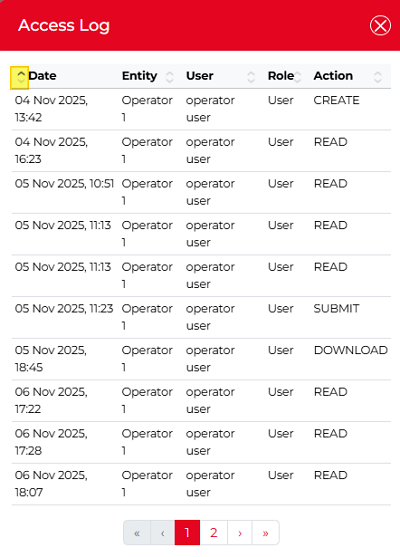
Clicking the icon opens the log showing the Date, Entity, User, Role, and Action columns. You can sort the columns by clicking the up- or down-pointing arrows beside each column header.
In the example below, the Date column is sorted chronologically from oldest to newest (indicated by the upward-pointing arrow highlighted in yellow).
This allows you to see the earliest record at the top and follow, step by step, on which day which user (and in what role) performed what action regarding the selected security objective.
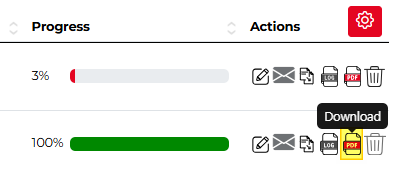
12. Download: For each entry, you have the option to download it as a PDF document. If you hover your mouse over the PDF icon (highlighted in yellow in the screenshot below), a tooltip will appear. You can download the selected security objective by clicking the corresponding Download button.
13. Delete: You can delete the selected entry as long as the security objective has not yet been submitted. Once it has been submitted, the delete icon becomes inactive. In the screenshot below, the top icon is active, while the bottom icon is inactive:
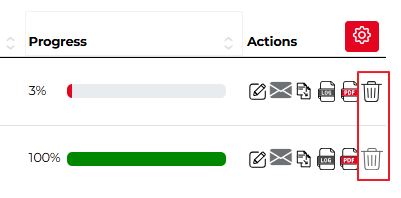
You can also see that in the Status column. The top icon shows that the entry is Unsubmitted, whereas the bottom icon shows that the entry is Under review. You can see these statuses by hovering your mouse over the relevant icons.