Operator Admin
If you are an Operator Admin, you can use the Administration Console as described below.
Please note that the terms Operator and Company are used interchangeably.
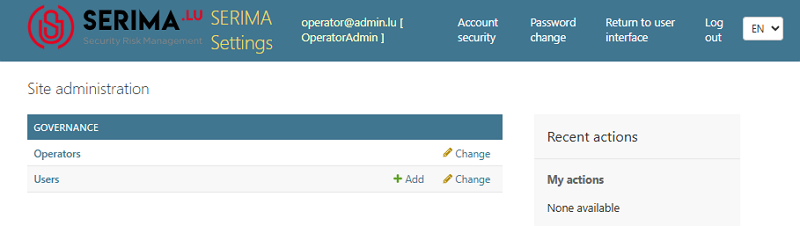
To access the Administration Console, once you have logged in as an Operator Admin, click the Settings button.

After clicking Settings, you will be directed to the Administration Console. As an Operator Admin, you have access only to the Operators and Users sections in the left panel, called Governance:
Operators
If you click the Operators link, you will be directed to the Select the Operator to change screen. Click the name of the Operator you want to change so you can make changes on the Change Operator screen.
At the top, you can view and edit the operator’s Contact Information (name, address, country, email address, and phone number). Fields marked with a red asterisk are mandatory. Beneath the Contact Information section, you can view (but cannot edit) the Configuration Information and the Entity Categories.

At the bottom of the screen, you can find the Contacts for Company section, which lists all users linked to the selected company. The following section describes the buttons available in the interface and their corresponding functionalities.

Choose: You can choose a user by clicking the dropdown menu.
Edit: You can edit the user’s contact information (first name, last name, and email address) by clicking the pencil icon.
View: The eye (view) icon will take you to the Change User screen, where you can also edit or delete the user.
Is Administrator: You can create an administrative user (Operator Admin) by selecting the Is administrator checkbox. If this checkbox is not selected, the user remains an Operator User without administrative privileges.
Approved: By selecting the Approved checkbox, you can change an Incident User into an Operator User.
Incident Users do not belong to any company; they report incidents independently. They are self-registered users who create their own accounts for the purpose of reporting incidents.
When you select the Approved checkbox, you confirm that the user is valid and can be linked to your company.
If you approve an Incident User and convert them into an Operator User, the Operator User will be able to view all incidents reported by your company.
Delete: The delete checkbox shows that the chosen user has been deleted and is not active in the system.
Users
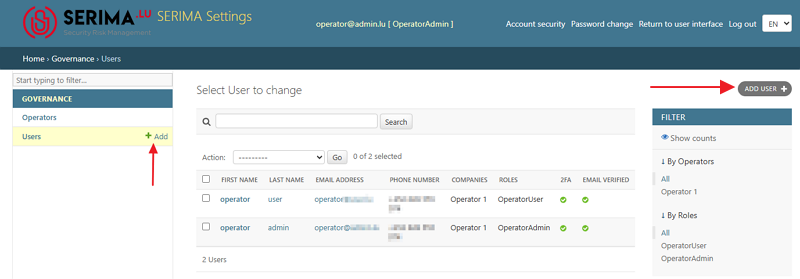
To view the number of users on the platform and their types, select the Users link in the Governance panel on the left. After clicking the Users link, you will be directed to the Select User to Change screen (also called the User Table).
The Operator Admin can create new Operator Users by clicking the +Add link or by using the Add User button in the top right-hand corner.
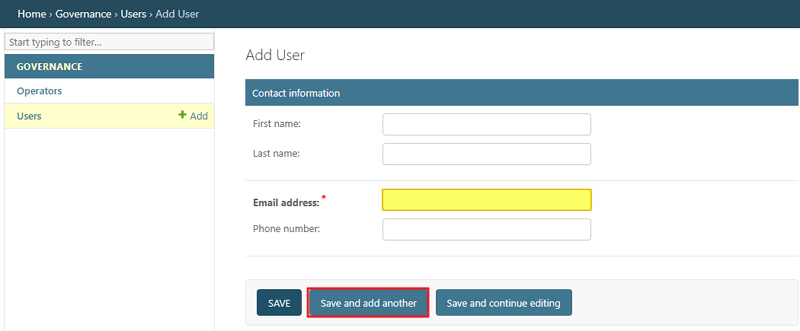
On the Add User screen, the Operator Admin can add new Operator Users by filling in the required fields (First name, Last name, Email address, and Phone number). The required field (Email address) is indicated with an asterisk (highlighted in yellow in the screenshot below). The Operator Admin can create several users by using the Save and add another button (circled in red in the screenshot below).
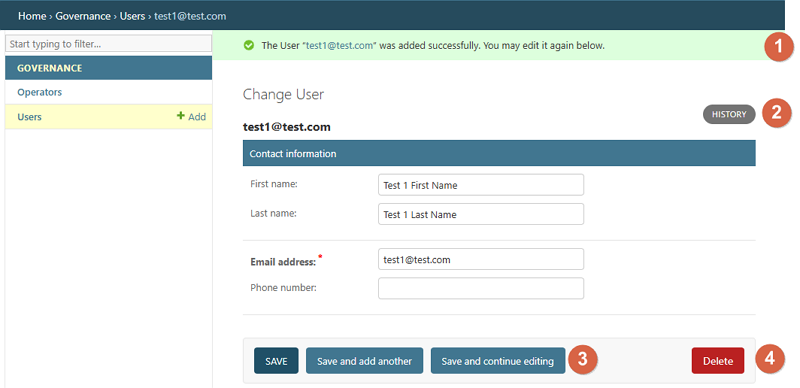
Once you have added a user and clicked Save, the user is linked to your company. The Administration Console informs you that the user was added successfully (1). If you click the History button (2), you can see when and by whom the selected user was added to your company. To edit the selected user, click Save and continue editing (3). To delete the user, click Delete (4).
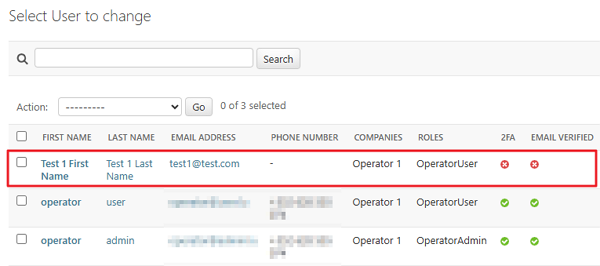
Once you have made the changes, you will be directed to the Select User to Change page. You can see that the newly added user has not enabled two-factor authentication (2FA) and that the email address is not verified.
How to reset 2FA?
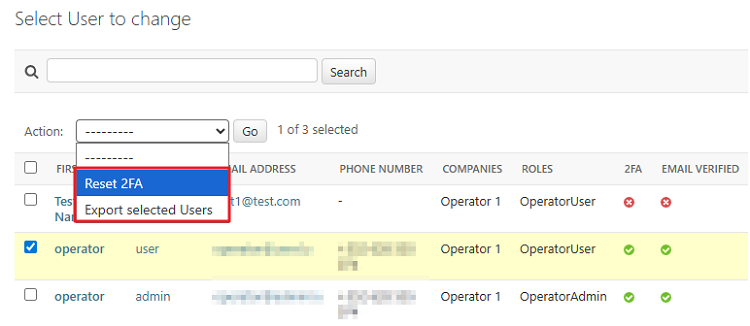
Choose a user by clicking the checkmark on the far left, before the First Name column. Then, go to the down-pointing arrow in the Action field and choose the option Reset 2FA.
How to export selected users?
Choose a user by clicking the checkmark on the far left, before the First Name column. Then, go to the down-pointing arrow in the Action field and choose the option Export selected users.
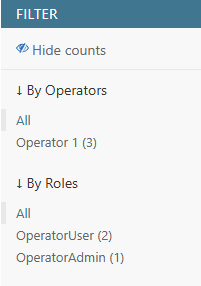
How to filter among users?
Use the Filter section on the far right. The Show counts link displays how many users and in what roles can be found within your company. In the screenshot below, there are three users in total: two Operator Users and one Operator Admin (if you choose to filter by roles). In case you do not want to see the numbers, click the Hide counts link.