Administration interface
Access to the administration page
Through the “Administration” link, left of the profile icon, above on the Incidents page,
the following roles have access to the site administration interface, that allows to create and modify some database objects :
PlatformAdmin : can create regulations, regulators, observers, other platform administrators
RegulatorAdmin : can create workflows for incidents, RegulatorUser for its regulator, other regulator administrators
RegulatorUser : can create companies and operator administrators
OperatorAdmin : can create OperatorUser for its company and other operator administrators
ObserverAdmin : can create ObserverUser for its Observer entity
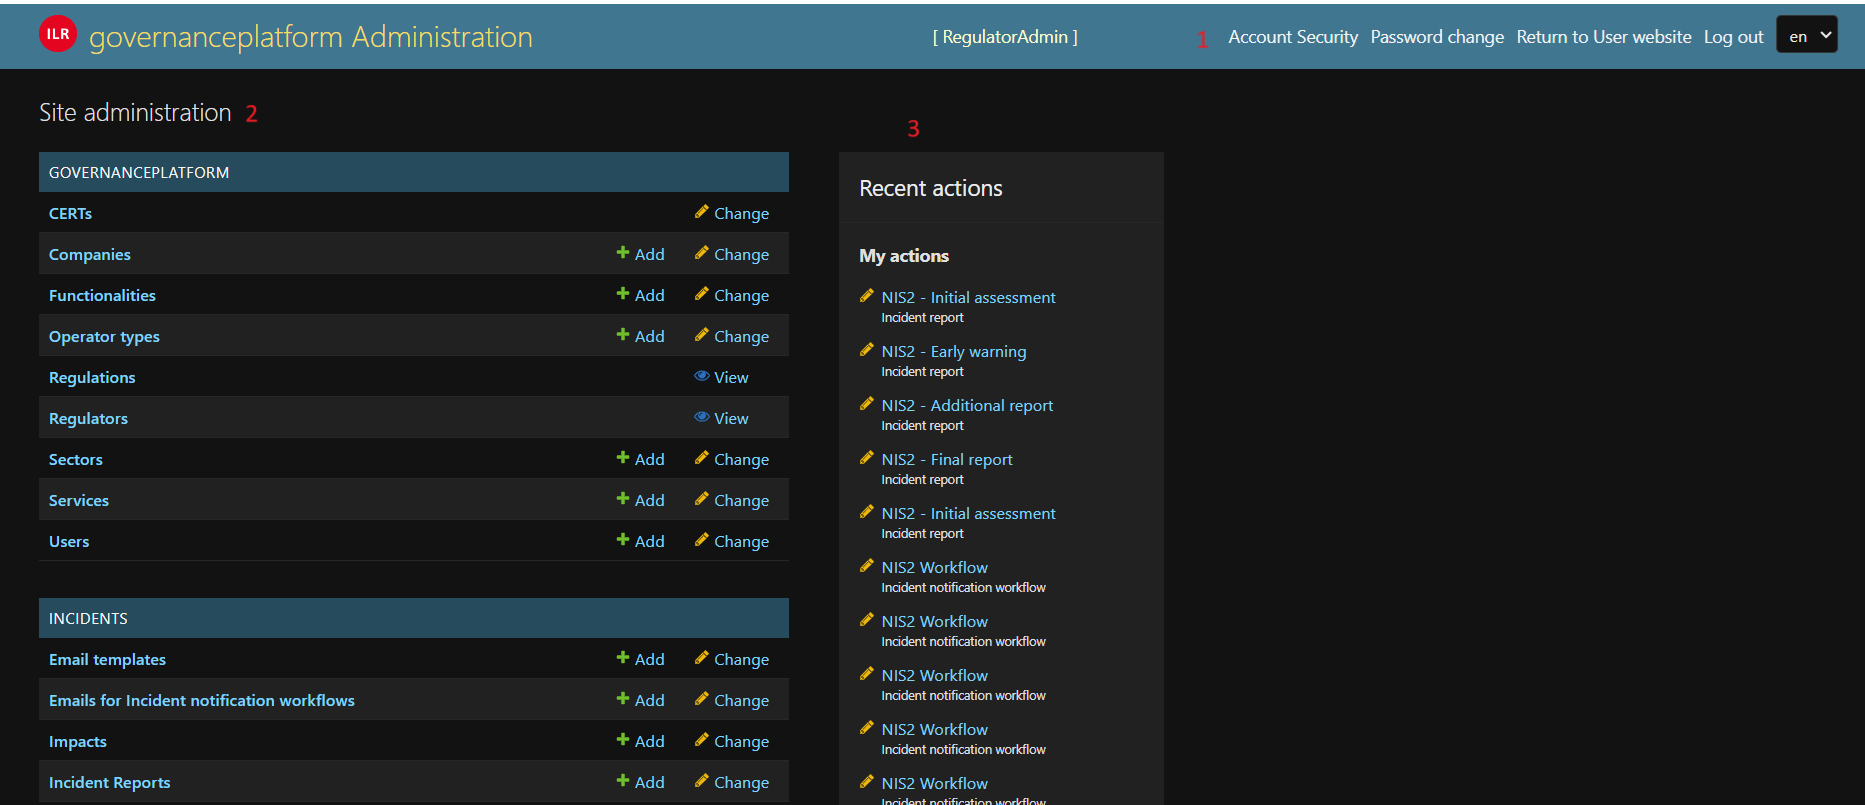
Fig. 4 Screenshot of an administrator page (Dark Theme).
The administrator page is composed of 3 parts:
1. The navigation bar, above, where you can change your account settings, language, also leave the website and return to the user website that shows incidents 2. A list of modules on the left, where you can select one type of objects related to incidents or users, and add or modify those 3. A list of your recent actions on the platform, on the right
Standard list view
If you click on a module (for example, “Impacts,” as shown below), you will see a list of objects of that type, along with the available actions. The actions may vary depending on the object type and your role.
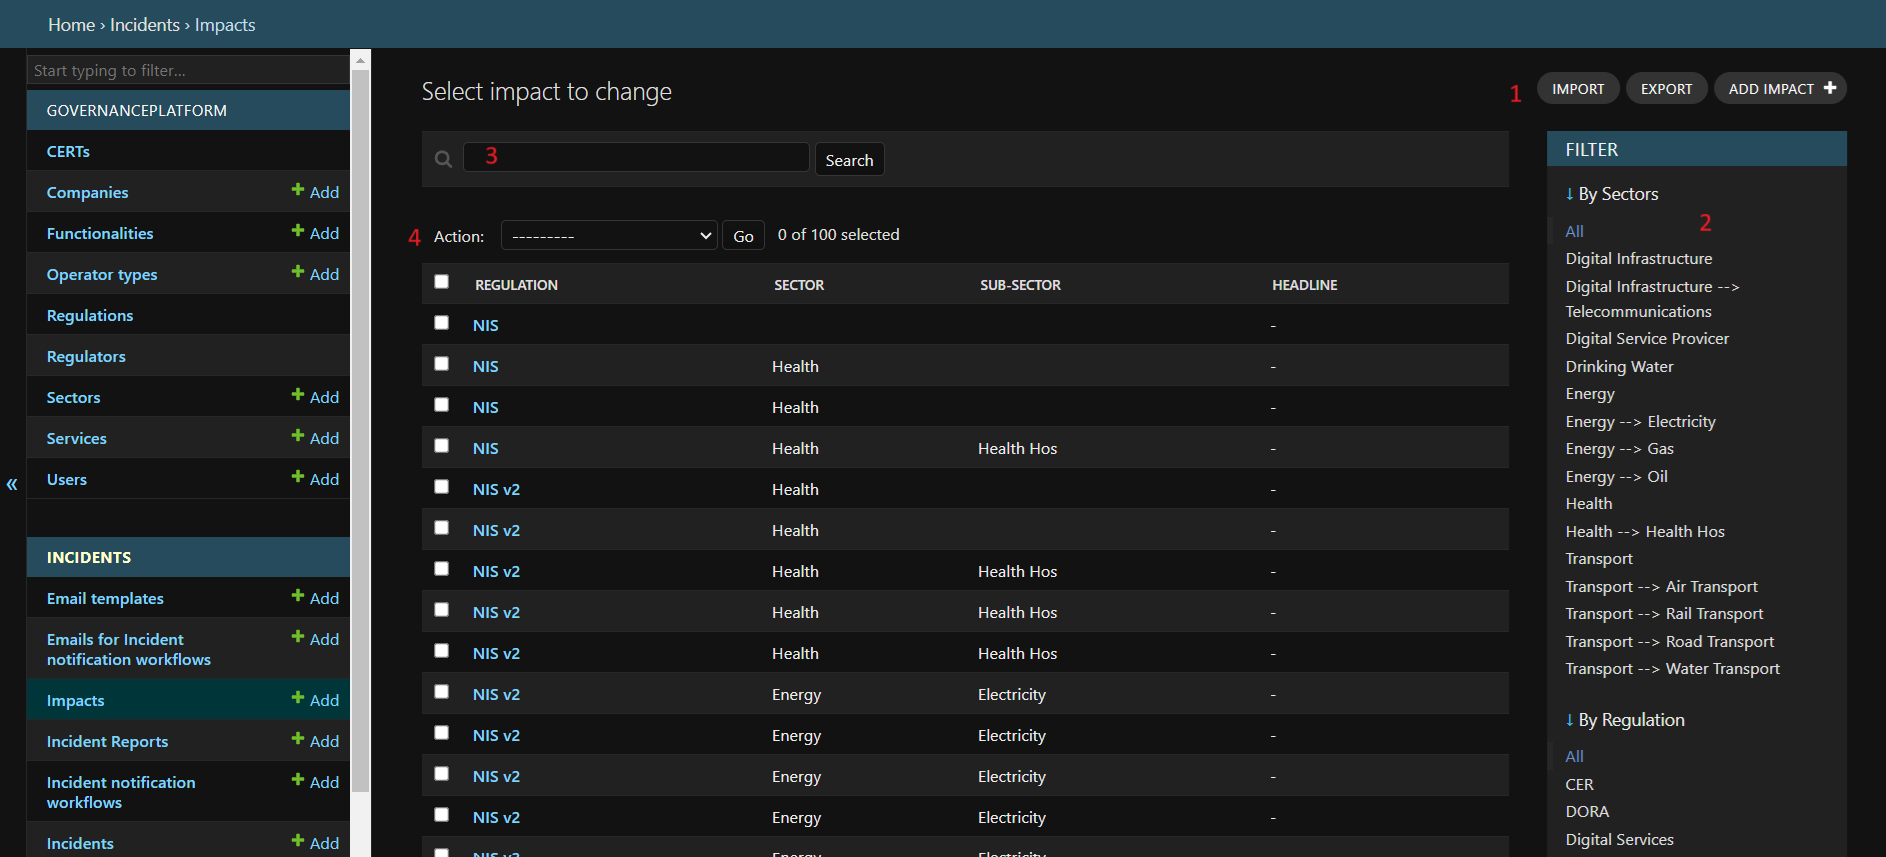
Fig. 5 Screenshot of a list page.
Above the list is a search field, that allow to narrow the list to objects including that string,
On the right, you can filter the list according to some attributes,
Just above the filter box, some buttons if present allow you to import or export the list in several formats (JSON, CSV, etc.),
A button in the same zone allows to add a new object,
Some group actions are also available, for that you need to tick the case corresponding to the entries you want to modify and select the appropriate action above the list.
Standard add/change function
If you click the “Add” button or the first field of an object, you are directed to the “change” page, like shown below. When editing an existing object, the values are prefilled with the current properties of the object. When adding a new object, the form is blank.
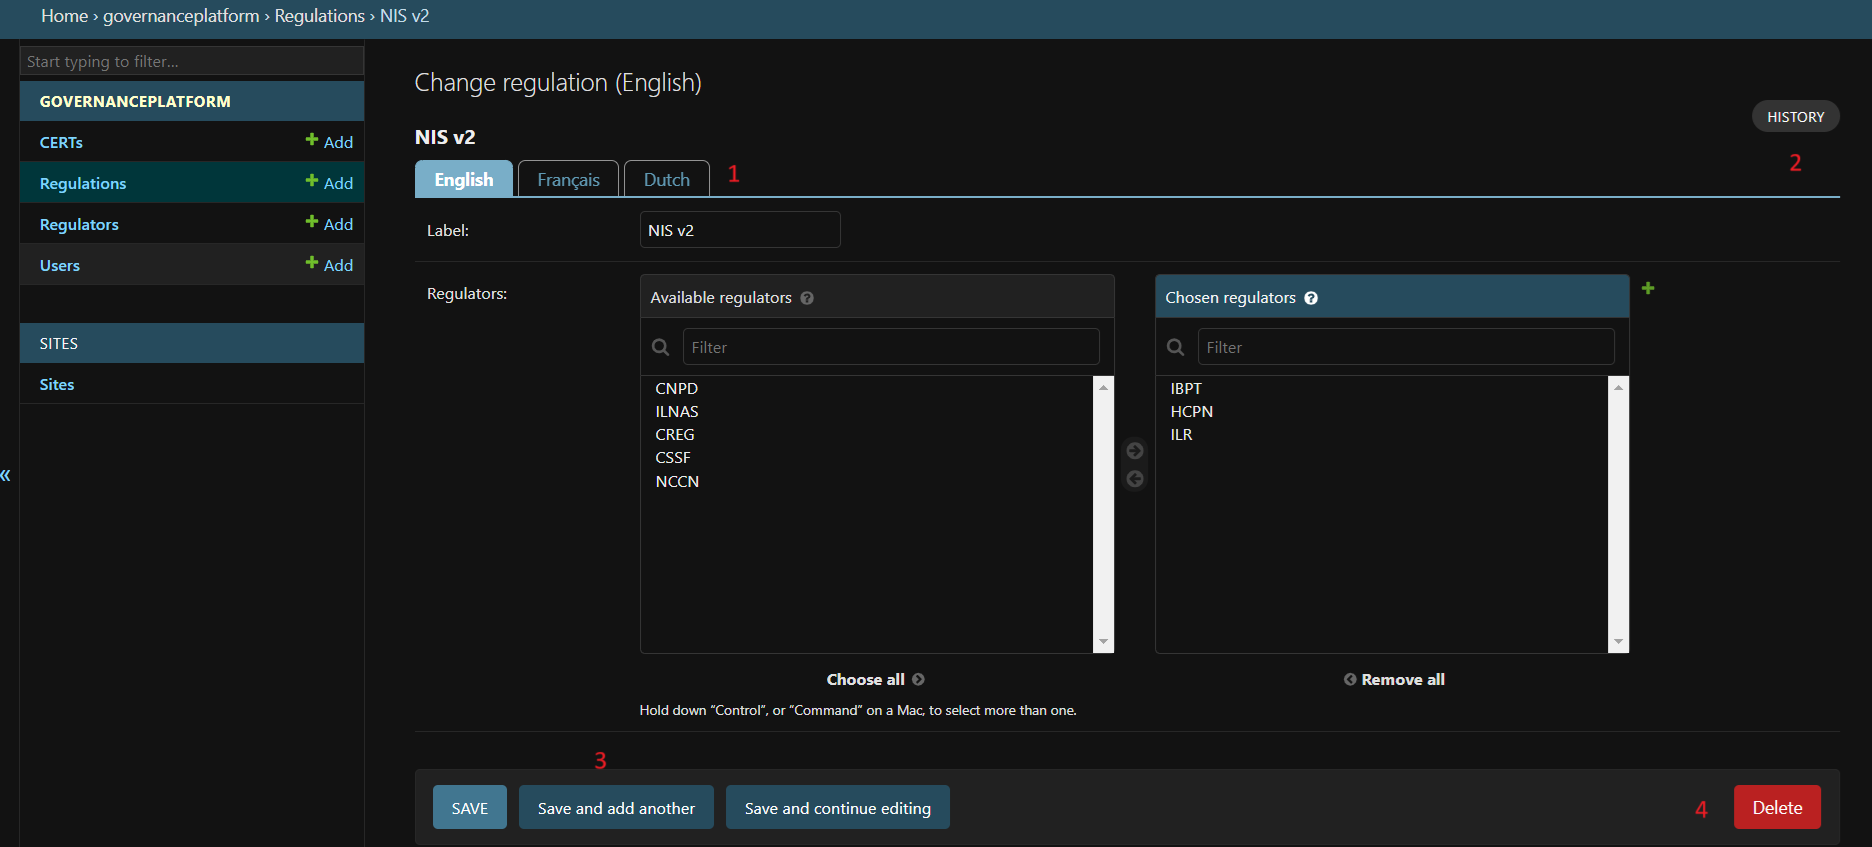
Fig. 6 Screenshot of an edition page.
1. Above the form, language tabs allow you to input several alternative versions of the object, since the platform is multi-linual. Note that you always need to fill at least the first language, as it is used as fallback, would some fields be left blank in the other languages. Also note that you need to save each language separately. You can do that using the “Save and continue editing” button. 2. In the upper right part of the window, an “History” button allows you to see the history of the object (all the modifications done) 3. In the lower part of the window, different possibilities are proposed to save the object. You may also be able to delete the object. If you choose to delete the object, a confirmation message will be shown with the impacts on other entities.
Creation of workflow for incident notification
Creation of workflow
The RegulatorAdmin role is the one who defines the workflows for incident notification.
Here, the standard way to create a workflow:
First create an item in the
Incident notification workflowsmodule corresponding to the regulation (e.g. NIS2, CER, GDPR, etc.).Then create the different steps of your workflow, that are called
incident reports(e.g. Early Warning, Final Report, etc.).
3. Now link the incident reports with the incident notification workflow, for that go on incident notification workflow
and choose the incident reports. The position defines the order of the reports.
4. Each incident report is made of a list of questions, organised in tabs called question category.
The question category can be created directly in the question form. You have to create the category only one time,
after you can reuse it. For a question, the question category should never remain blank.
Note
The
question categoryhelps for the rendering of the form for the user who submits the notification. There are different types of questions, such as FreeText or Multiple choice. Some can havepredefined answers.Caution
It’s important to use one answer only for one question. You can create the predefined answer directly in the question form.**If you want to translate in several languages, you must first fill one language, click on “save and continue editing” and go to the other language, if you don’t do that you will loose the content of the predefined answer**.
Your incident workflow is now done.
The workflow system also includes an automatic emailing system. The templates of the emails have to be defined in the Email templates entity. Each email has a name, subject, and content.
The content can be personalized with data from the database, using the following tags:
#INCIDENT_NOTIFICATION_DATE# : first notification of the incident
#INCIDENT_DETECTION_DATE# : detection date of the incident
#INCIDENT_STARTING_DATE#: starting date of the incident
#INCIDENT_ID# : reference of the incident
Each incident notification workflow has:
Opening email : email sent when the incident is created
Closing email : email sent when the incident is closed (by the regulator)
Report status changed email : when there is a change in the lifecycle of the incident, for example, a submission of a new report.
The three elements above refer to an Email template that has to be defined.
Those emails can be completed by clicking on the Emails for incident notification workflows.
For each incident reports (e.g. Early Warning), it is possible to send other emails
such as reminders. In the Emails for incident notification workflows, you can define emails that are sent with a delay.
This delay can start from either the Notification Date of the report or the date of the previous incident report.
For each couple regulation/sector(s), it is possible to define an impact.
These impacts help determine if an incident is significant or not.
If one of the impacts is selected by the person submitting the incident, the incident is classified as “significant”.
Modification of workflow
During the lifecycle of a workflow, it may evolve. To support this, you can modify the questions in each incident report. The application keeps a history of questions and answers, ensuring that the correct values are displayed in the incident history and in the PDF.
The admin interface only shows the latest version of the report.